Tuesday, December 7, 2010
Ubuntu: How to hide IP address
Here is the tutorials for hide the IP address during surfing via firefox.
Step one.
Add the following in the software sources for Ubuntu 10.04 and 10.10 versions
deb http://deb.torproject.org/torproject.org lucid main
For various version of ubuntu click the link
Now the type the following in terminal for authentication key
gpg --keyserver keys.gnupg.net --recv 886DDD89
gpg --export A3C4F0F979CAA22CDBA8F512EE8CBC9E886DDD89 | sudo apt-key add -
Then
sudo apt-get update
sudo apt-get install tor tor-geoipdb
Step two
Edit the /etc/polipo/config
Sudo gedit /etc/polipo/config
Erase all content of config file and copy & paste from the link.
Then type the following in terminal for restart the config file
sudo /etc/init.d/polipo restart
Step Three
Open the firefox and intall the add-on
Then restart the firefox.
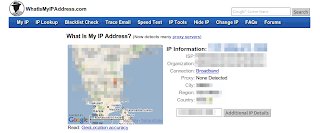
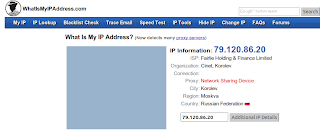
For checking our ip address go to http://whatismyipaddress.com
Before hide the ip address
After hide the ip address
Posted by
arulmozhi r
at
11:18 AM
11
comments
Email ThisBlogThis!Share to XShare to FacebookShare to Pinterest
Labels:
ananymous
Wednesday, December 1, 2010
Ubuntu: How to install Google Earth version 6
Ubuntu, here is the simple instructions for installing the Google Earth version 6
Step 1: Type the following in terminal
sudo apt-get install lsb-core
Step 2:
Now install the google earth package for create deb package
sudo apt-get install googleearth-package
cd && make-googleearth-package --force (This command will create deb package in Home folder)
Now double click on deb package for google earth.
Then go to Applications->Internet->Google Earth
Posted by
arulmozhi r
at
8:09 PM
0
comments
Email ThisBlogThis!Share to XShare to FacebookShare to Pinterest
Labels:
googleearth
Thursday, November 11, 2010
Ubuntu: How to remove the user name in top panel
If you want to Remove the user name in top panel please type the following command in terminal
gconftool -s /system/indicator/me/display --type int 0
If you want to restore the user name in top panel
gconftool -s /system/indicator/me/display --type int 1
If you like your real name( in about me) in top panel
gconftool -s /system/indicator/me/display --type int 2
Before remove the user name in panel
After remove the user name
Posted by
arulmozhi r
at
6:08 PM
0
comments
Email ThisBlogThis!Share to XShare to FacebookShare to Pinterest
Labels:
tips
Tuesday, November 2, 2010
Ubuntu: How to change drive label via terminal
First install the following applications.
sudo apt-get ntfsprogs
Then type the following command and note the drive for change the name.
sudo fdisk -l
sudo ntfslabel /dev/sda7 [name ]
For example one drive name is soft
Before change the drive name
sudo ntfslabel /dev/sda7 software
sudo apt-get ntfsprogs
Then type the following command and note the drive for change the name.
sudo fdisk -l
sudo ntfslabel /dev/sda7 [name ]
For example one drive name is soft
Before change the drive name
sudo ntfslabel /dev/sda7 software
Posted by
arulmozhi r
at
7:40 PM
0
comments
Email ThisBlogThis!Share to XShare to FacebookShare to Pinterest
Labels:
tips
Sunday, October 10, 2010
Ubuntu: How to upgrade from 10.04 to 10.10
Ubuntu 10.10 is out today. Here is the tutorials for how to upgrade from 10.04 to 10.10.
1.Open the release-upgrade from terminal
sudo gedit /etc/update-manager/release-upgrade and set prompt=normal
2.Go to System->Administration->update manager->check
Then press the upgrade button.The upgrade process will begun
1.Open the release-upgrade from terminal
sudo gedit /etc/update-manager/release-upgrade and set prompt=normal
2.Go to System->Administration->update manager->check
Then press the upgrade button.The upgrade process will begun
Posted by
arulmozhi r
at
8:14 PM
0
comments
Email ThisBlogThis!Share to XShare to FacebookShare to Pinterest
Labels:
upgrade
Sunday, October 3, 2010
Ubuntu: How to install Libreoffice
Here is the tutorial for how to install libreoffice in ubuntu instead of open office..
In terminal type the following for download.
cd Desktop
wget http://download.documentfoundation.org/libreoffice/testing/LO_3.3.0-beta1_Linux_x86_install-deb_en-US.tar.gz
Exatract and save.
Then
sudo dpkg -i ~/Desktop/en-US/DEBS/*.deb
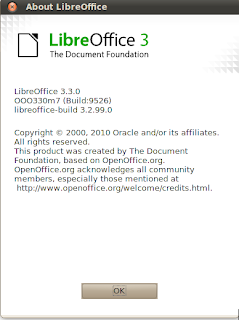
After installation
sudo dpkg -i ~/Desktop/en-US/DEBS/desktop-integration/libreoffice3.3-debian-menus_3.3-9526_all.deb
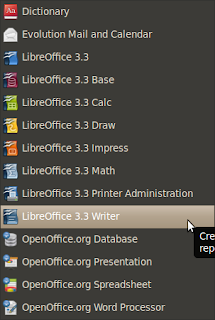
Goto Applications->Office
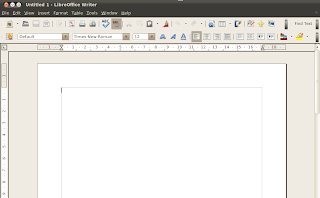
1. Libre office 3.3 Writer
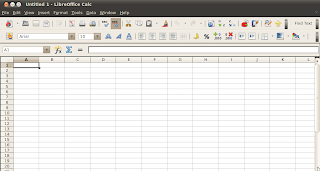
2.Libreoffice 3.3 Calc
You can use libreoffice and openoffice. Removing open office not necessary
Posted by
arulmozhi r
at
8:46 AM
0
comments
Email ThisBlogThis!Share to XShare to FacebookShare to Pinterest
Labels:
libreoffice
Wednesday, September 15, 2010
Ubuntu: How to take screenshot via terminal
In ubuntu, a simple and open source programe imagmagick for taking screenshot via terminal.
Type the following and install the application
sudo apt-get install imagemagick
Then
import xxxxx.png, here xxxxx is filename as you like.
Now a full screen picture.
Selected area picture
Type the following and install the application
sudo apt-get install imagemagick
Then
import xxxxx.png, here xxxxx is filename as you like.
Now a full screen picture.
Selected area picture
Posted by
arulmozhi r
at
8:07 PM
0
comments
Email ThisBlogThis!Share to XShare to FacebookShare to Pinterest
Labels:
tips
Sunday, August 29, 2010
Ubuntu: How to find last correction in gconf-editor
Here is the tutorials for how to find the last correction in gconf-editor.
Type the keys Alt+F2,then type 'gconf-editor' and press run.
Then navigate apps->gconf-editor, select recent on right side.
Type the keys Alt+F2,then type 'gconf-editor' and press run.
Then navigate apps->gconf-editor, select recent on right side.
Posted by
arulmozhi r
at
2:33 PM
0
comments
Email ThisBlogThis!Share to XShare to FacebookShare to Pinterest
Labels:
gconf-editor
Ubuntu: How to change window key to ubuntu key
Now, change window key to ubuntu key, it is simple and easy way.
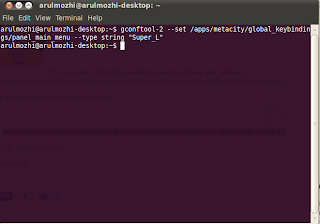
Type the following in terminal
gconftool-2 --set /apps/metacity/global_keybindings/panel_main_menu --type string "Super_L"
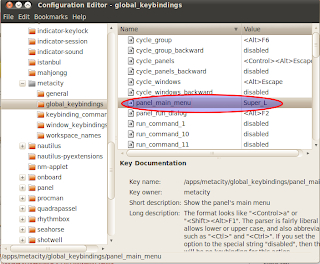
The second method type Alt+F2, then type 'gconf-editor' press ok
Navigate
apps->metacity->global_keybindings-> . Find 'panel_main_menu' on right side. Press right click on panel_main_menu', select edit key and type 'Super_L', then press ok.
Posted by
arulmozhi r
at
8:03 AM
0
comments
Email ThisBlogThis!Share to XShare to FacebookShare to Pinterest
Labels:
tips
Wednesday, August 18, 2010
Ubuntu: How to edit/save google docs via nautilus file manager
How to edit/save google docs via nautilus file manager without any browser.
First type the following in terminal
sudo add-apt-repository ppa:doctormo/ppa
sudo apt-get update && sudo apt-get install gdocs-mount-gtk
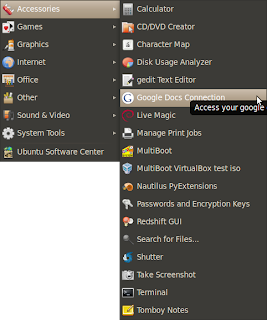
After installation, go to
Applications->Accessories->Google Docs Connection
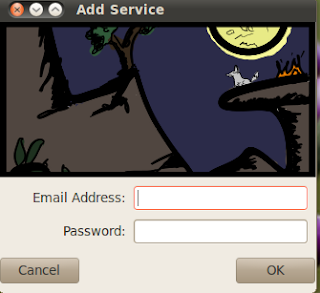
Type the email address and password, then press ok.
Double click the Google docs drive,
Now edit/save the google docs easily without any browser.
Posted by
arulmozhi r
at
6:52 AM
2
comments
Email ThisBlogThis!Share to XShare to FacebookShare to Pinterest
Labels:
nautilus
Saturday, August 14, 2010
Ubuntu A torrent search application.
Torrent search application is used for searching torrent files in different torrent websites. Download and install it. Then
Go to Applications->Internet->Torrent search
Type name of the file and press find button
Double click the desired torrent files then download the torrent files
This application is supports following websites
www.btscene.com/
www.kickasstorrents.com/
www.rarbg.com/
www.sumotorrent.com/
www.thepiratebay.org/
www.torrentbit.net/
www.torrenthound.com/
www.torrentzap.com/
www.yourbittorrent.com/
Posted by
arulmozhi r
at
8:05 PM
0
comments
Email ThisBlogThis!Share to XShare to FacebookShare to Pinterest
Labels:
torrent
Saturday, August 7, 2010
Ubuntu: A easy way to open a file system
Here is a simple way to open a file system.
Now press '/' key in the desktop, the following window is open
Type the file path in Location. for example type /etc/default/ in the location
Then press open button, the location is opened
Now press '/' key in the desktop, the following window is open
Type the file path in Location. for example type /etc/default/ in the location
Then press open button, the location is opened
Posted by
arulmozhi r
at
7:01 PM
0
comments
Email ThisBlogThis!Share to XShare to FacebookShare to Pinterest
Labels:
tips
Friday, August 6, 2010
Ubuntu: How to create launcher to a website
Now here is the tutorials for create desktop launcher for a special website instead of open the website from web browser.
In terminal type the following lines
sudo apt-get install prism
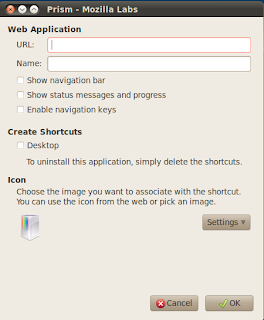
Now launch the program go to
Applications->internet->prism
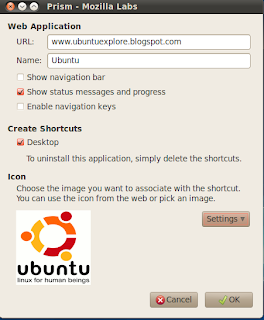
Then type the favourite website name in url section.
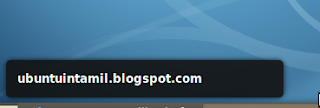
Check Show status messages and progress
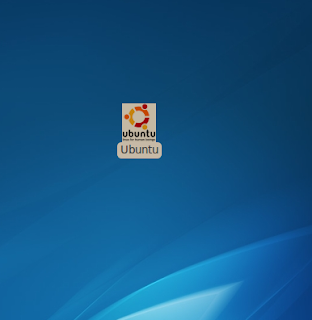
And check the desktop under create desktops. Choose favourite icon under icon section. Then press ok
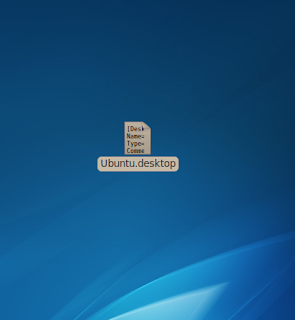
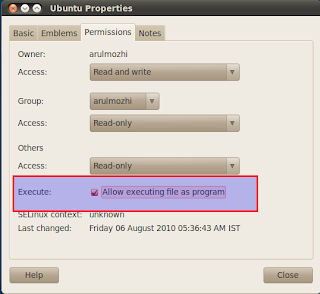
Now the right click on launcher, select properties->permissions
Check allow executing file as program under execute.
Then press the close button.
Posted by
arulmozhi r
at
8:39 PM
0
comments
Email ThisBlogThis!Share to XShare to FacebookShare to Pinterest
Labels:
tips
Sunday, July 18, 2010
Ubuntu: PPA search via terminal
PPA search is small and simple tool for searching PPA for packages.
Now type the following in terminal
sudo add-apt-repository ppa:wrinkliez/ppasearch && sudo apt-get update
sudo apt-get install ppasearch
To run the programe type ppasearch in terminal
Now type the following in terminal
sudo add-apt-repository ppa:wrinkliez/ppasearch && sudo apt-get update
sudo apt-get install ppasearch
To run the programe type ppasearch in terminal
Posted by
arulmozhi r
at
1:39 PM
0
comments
Email ThisBlogThis!Share to XShare to FacebookShare to Pinterest
Labels:
ppa
Saturday, July 10, 2010
Ubuntu: A file manager Midnight commander
In ubuntu a nice file manager Midnight commander. It is easily installed and use it.
In ubuntu type the following in terminal
sudo apt-get install mc
mc
It contains many features
1.Master renaming files,editing and copying
2.To view the rpm, deb files
3.Arrow keys control the selection
4.Function keys performs operations
5.It is mouse suppoort
It is also downloaded from here
In ubuntu type the following in terminal
sudo apt-get install mc
mc
It contains many features
1.Master renaming files,editing and copying
2.To view the rpm, deb files
3.Arrow keys control the selection
4.Function keys performs operations
5.It is mouse suppoort
It is also downloaded from here
Posted by
arulmozhi r
at
8:48 AM
1 comments
Email ThisBlogThis!Share to XShare to FacebookShare to Pinterest
Labels:
file
Thursday, July 8, 2010
Ubuntu: To place the notification in different screen corners
Here is the tutorials for place to notifications in different corners.
First add the following repo in software sources.Type the following line in terminal
sudo add-apt-repository ppa:leolik/leolik
Then type following commands in terminal
sudo apt-get update && sudo apt-get upgrade
pkill notify-osd
Now place the notification in bottom right corner, type the following in terminal
gconftool-2 -s /apps/notify-osd/gravity --type=int 3
then place the notification in bottom left corner
gconftool-2 -s /apps/notify-osd/gravity --type=int 4
The syntax of the command is
gconftool-2 -s /apps/notify-osd/gravity --type=int n
Here n is the number from the following
1 - top-right corner
2 - middle-right
3 - bottom-right corner
4 - bottom-left corner
5 - middle-left
6 - top-left corner
For the test type the following
notify-send xxx xxx is the text to send for notification
Posted by
arulmozhi r
at
11:21 AM
1 comments
Email ThisBlogThis!Share to XShare to FacebookShare to Pinterest
Labels:
osd
Sunday, July 4, 2010
Ubuntu: Tracking your stolen linux laptop or desktop
Prey is simple and easy opensource application for tracking stolen linux laptop or desktop.
Now download the prey application and install it.
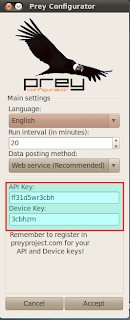
Then go to Applications->system tools->prey configurator
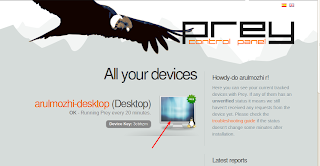
Getting api key and device key register in http://preyproject.com.
Now open preyproject.com and login.
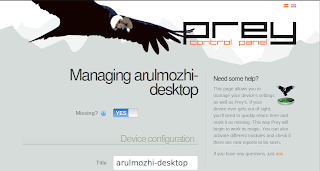
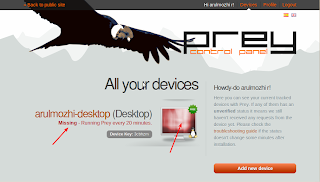
If your laptop is stolen, press the green colour and give details of your laptop.
Then press update button. If the stolen laptop connected to the internet, the details of the laptop is coming through email.
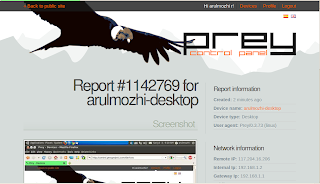
Now click the link the detailed report here
Here the remote ip address is shown and photo of the operator thro' webcam.
Posted by
arulmozhi r
at
12:47 AM
0
comments
Email ThisBlogThis!Share to XShare to FacebookShare to Pinterest
Labels:
missing
Subscribe to:
Posts (Atom)