Mozilla thunderbird 3.1 is released finally. This 3.1 version comes with many improvements like quick filter tool bar for searching purpose.
There are two methods of installing the verison.
1. Ubuntuzilla
Download the ubuntuzilla and install it
Type the following in terminal
ubuntuzilla.py -a install -p thunderbird
2. Download the .deb file from the following link and install it.
Thunderbird i386
Sunday, June 27, 2010
Ubuntu: A new version of Mozilla Thunderbird 3.1
Posted by
arulmozhi r
at
10:59 AM
0
comments
Email ThisBlogThis!Share to XShare to FacebookShare to Pinterest
Labels:
thunderbird
Saturday, June 26, 2010
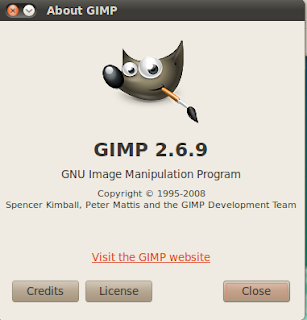
Ubuntu: GIMP new version 2.6.9
GIMP is a open source programme. A new version 2.6.9 is released. It is better than photoshop.
How to install the new version in ubuntu?
Type the following in terminal and add in software source
sudo add-apt-repository ppa:ferramroberto/linuxfreedomlucid
sudo apt-get update
If you already installed, type the following in terminal
sudo apt-get upgrade
New installed, type the following in terminal
sudo apt-get install gimp
It is a cross platform programme, a window version is also available
Posted by
arulmozhi r
at
11:17 AM
0
comments
Email ThisBlogThis!Share to XShare to FacebookShare to Pinterest
Labels:
gimp
Friday, June 25, 2010
Ubuntu: How to install new version of VLC
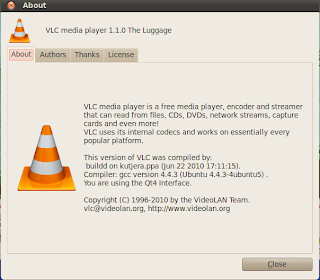
Now new version of VLC 1.1.0 is released. Here is the tutorials for how to install the new version
Type the following commands in terminal and add the software sources
sudo add-apt-repository ppa:c-korn/vlc && sudo apt-get update
sudo apt-get install vlc mozilla-plugin-vlc
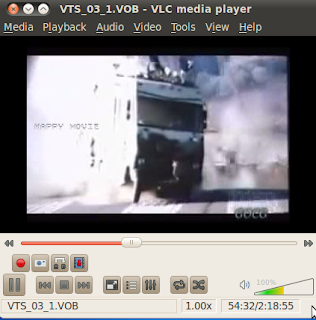
Then go to Applications->sound & video->VLC media player
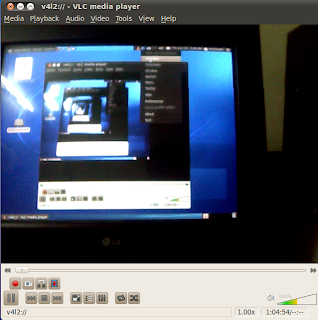
A view via web camera
Type the following commands in terminal and add the software sources
sudo add-apt-repository ppa:c-korn/vlc && sudo apt-get update
sudo apt-get install vlc mozilla-plugin-vlc
Then go to Applications->sound & video->VLC media player
A view via web camera
Posted by
arulmozhi r
at
10:14 AM
0
comments
Email ThisBlogThis!Share to XShare to FacebookShare to Pinterest
Labels:
vlc
Monday, June 21, 2010
Ubuntu: Auto hide cursor after 5 seconds
Here is the tutorials for how to hide the cursor after 5 seconds
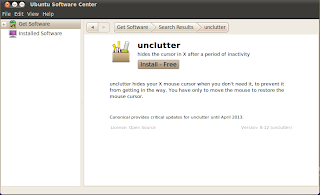
Now go to ubuntu software centre and search the programme 'Unclutter' and install it.
Applications->ubuntu software centre
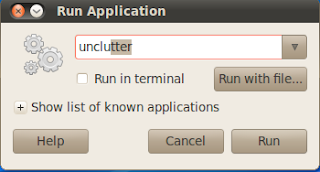
For execute the programme press 'Alt+F2' . Now open the window and type the 'unclutter' in command box then press run
Restart the computer, the function is working properly.
Now go to ubuntu software centre and search the programme 'Unclutter' and install it.
Applications->ubuntu software centre
For execute the programme press 'Alt+F2' . Now open the window and type the 'unclutter' in command box then press run
Restart the computer, the function is working properly.
Posted by
arulmozhi r
at
8:15 PM
0
comments
Email ThisBlogThis!Share to XShare to FacebookShare to Pinterest
Labels:
tips
Sunday, June 20, 2010
Ubuntu: How to beautify your bootloader using burg
Here is the tutorials for how to beautify your bootloader using burg
In terminal type the following command
sudo add-apt-repository ppa:bean123ch/burg sudo apt-get update && sudo apt-get install burg burg-themes
For install burg in master boot loader
sudo burg-install "(hd0)" Here hd0 is harddisk for installing burg
Finally
sudo udate-burg
Now restart the computer the default bootloader is colorful
For various pictures for bootloader press 't' a long list will present
Select the theme and restart
For previewing the splast image, type the following command in terminal
burg-emu
Posted by
arulmozhi r
at
4:57 PM
4
comments
Email ThisBlogThis!Share to XShare to FacebookShare to Pinterest
Labels:
splash
Friday, June 18, 2010
Ubuntu: How to install Ubuntu system panel
Install ubuntu system panel for easy access the ubuntu menu application,places and system.
In terminal
sudo add-apt-repository ppa:malacusp/ppa
sudo apt-get update
sudo apt-get install usp2 usp2-extras
Now add top panel, right click on top panel select add to panel and search Ubuntu system panel and select. Now the icon is appeared in top panel
Here the video for how to work ubuntu system panel
Posted by
arulmozhi r
at
6:47 PM
0
comments
Email ThisBlogThis!Share to XShare to FacebookShare to Pinterest
Labels:
system
Tuesday, June 15, 2010
Ubuntu: A nice splash images for grub 2 loader
Here a nice splash images for grub 2 loader,are very easy to install and add images in grub2 loader. It is a .deb files
1. blue-splash-image.deb
2. brown-splash-image.deb
3. lucid-splash-image.deb
Download the deb package and install it for splash images
Posted by
arulmozhi r
at
9:35 PM
0
comments
Email ThisBlogThis!Share to XShare to FacebookShare to Pinterest
Labels:
splash
Monday, June 14, 2010
Ubuntu: How to convert ogv to avi
Here is the tutorial for how to convert ogv format to avi format, it is used for upload a video to youtube.
In terminal type the following command
mencoder ram.ogv -o ram.avi -oac mp3lame -lameopts fast:preset=standard -ovc lavc -lavcopts vcodec=mpeg4:vbitrate=4000
ram.ogv is a original video format and ram.avi is converted format
In terminal type the following command
mencoder ram.ogv -o ram.avi -oac mp3lame -lameopts fast:preset=standard -ovc lavc -lavcopts vcodec=mpeg4:vbitrate=4000
ram.ogv is a original video format and ram.avi is converted format
Posted by
arulmozhi r
at
7:33 PM
9
comments
Email ThisBlogThis!Share to XShare to FacebookShare to Pinterest
Labels:
tips
Saturday, June 12, 2010
Ubuntu: How to record internet radio using vlc
VLC is open source programme, now using for recording a internet radio.
First open a empty text file in terminal
sudo gedit recordint.sh
Now copy and paste the following lines
#!/bin/sh
vlc --run-time=10800 http://www.live365.com/play/319909? --sout "#duplicate{dst=std{access=file,mux=raw,dst=/home//mfn.mp3}" vlc://quit ;
Save and exit.
In Terminal
sudo chmod +x recordint.sh
sudo ./recordint.sh
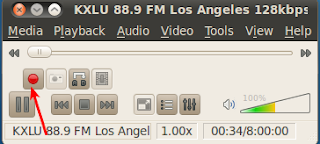
For recording press red colour button.
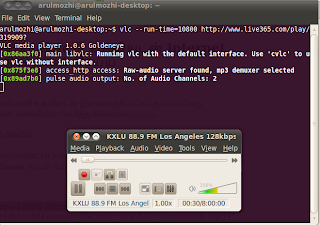
For listening the internet radio thro system speakers type the following in terminal
vlc --run-time=10800 http://www.live365.com/play/319909?
Posted by
arulmozhi r
at
2:17 PM
0
comments
Email ThisBlogThis!Share to XShare to FacebookShare to Pinterest
Labels:
vlc
Wednesday, June 9, 2010
Ubuntu: Changing wall papers of real time earth
Now changing desktop wall papers of earth. It is real time earth pictures.
Firstly, install the gnome schedule
In terminal
sudo apt-get install gnome-schedule
Then go to
Applications->System Tools->Scheduled Tasks
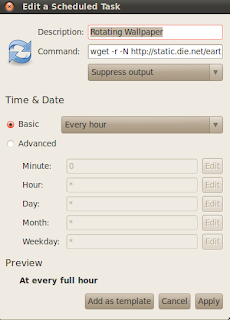
Now press New button
Type Description->Rotating wall paper
Command->wget -r -N http://static.die.net/earth/mercator/1600.jpg
Next option ->suppress output
Then press apply
The download jpg picture is saved in /home/usrname/static.die.net/earth/mercator/1600.jpg.
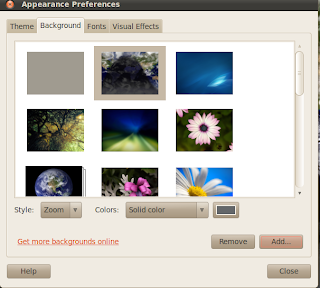
Now right click on desktop and select change desktop background->background. Press Add and navigate the /home/username/static.die.net/earth/mercator and select 1600.jpg file.
Posted by
arulmozhi r
at
12:18 AM
0
comments
Email ThisBlogThis!Share to XShare to FacebookShare to Pinterest
Labels:
wallpaper
Tuesday, June 8, 2010
Ubuntu: Create a shortcut for opening filesystem
Now tutorials for create a shortcut for opening filesystem. Press the right click on desktop in free space and select Create Launcher
Type 'File system' in Name section.
In Command section type 'nautilus /' without quotas Then press ok. Now create a short on desktop.Change the icon press icon section and select icons from the list of files
Select the launcher and drag to top panel.
Now press the icon the filesystem is open
Type 'File system' in Name section.
In Command section type 'nautilus /' without quotas Then press ok. Now create a short on desktop.Change the icon press icon section and select icons from the list of files
Select the launcher and drag to top panel.
Now press the icon the filesystem is open
Posted by
arulmozhi r
at
5:50 PM
0
comments
Email ThisBlogThis!Share to XShare to FacebookShare to Pinterest
Labels:
tips
Monday, June 7, 2010
Ubuntu: Testing correct password with small script
Testing correct password with nice script
Open a text file pass.sh using gedit. Copy and paste the following lines
#!/bin/bash
# Script accept password using read commnad
# Not *very secure*, this script is for learning purpose only
# -------------------------------------------------------------------------
PASS="abc123"
read -s -p "Password: " mypassword
echo ""
[ "$mypassword" == "$PASS" ] && echo "Password accepted" || echo "Access denied"
Save and exit.
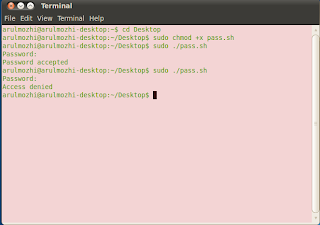
Then in terminal
sudo chmod +x pass.sh
sudo ./pass.sh
The password is 'abc123'
This script is learning purpose only
Posted by
arulmozhi r
at
8:50 PM
0
comments
Email ThisBlogThis!Share to XShare to FacebookShare to Pinterest
Labels:
script
Saturday, June 5, 2010
Ubuntu: How to create url shortcut in desktop
Now, the tutorials for how to create short cut of url in Desktop.
First, install the firefox addon namely deskcut
Now open the firefox and type the url address in the address bar, then select the complete url and drag to the desktop. Now the url shortcut icon in desktop. doubble click on the icon the url is opened.
First, install the firefox addon namely deskcut
Now open the firefox and type the url address in the address bar, then select the complete url and drag to the desktop. Now the url shortcut icon in desktop. doubble click on the icon the url is opened.
Posted by
arulmozhi r
at
10:26 PM
1 comments
Email ThisBlogThis!Share to XShare to FacebookShare to Pinterest
Labels:
firefox
Friday, June 4, 2010
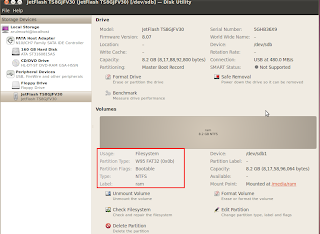
Ubuntu: How to format pen drive using disk utility
Here the tutorials for format the pendrive via disk utility.
Insert pendrive
Right click on the pendrive icon and select format
Linux file fomat in Type option. For windows option i.e. ntfs,fat press Disk Utility
First press Unmount volume for unmount the pendrive then press Format volume.
Again press Format, the process is start
After format
For change the label name Press Edit file system label
For change the type of the partition press Edit Partition
Posted by
arulmozhi r
at
7:38 PM
0
comments
Email ThisBlogThis!Share to XShare to FacebookShare to Pinterest
Labels:
format
Wednesday, June 2, 2010
Ubuntu: A customized notification osd
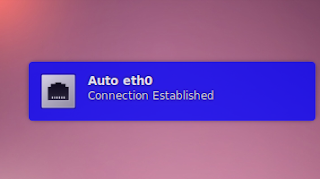
Here tutorials how to customize the notification osd in background colour,text font color,etc
In Terminal type the following
sudo add-apt-repository ppa:leolik/leolik
sudo add-apt-repository ppa:amandeepgrewal/notifyosdconfig for adding in software sources.
Then
sudo apt-get update && sudo apt-get upgrade and
sudo apt-get install notifyosdconfig for install the notifyosd programme.
Now go to Applications->Accessories->Notifyosd Configuration for configuration of background colour and text font colour
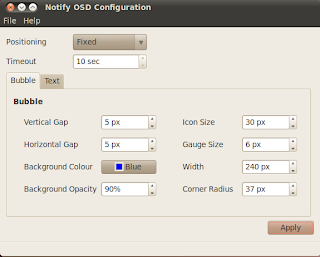
Change the background colour and press apply
Here change the text font colour and press apply
The sample notification is follows
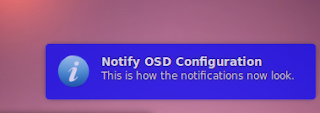
Go to File option save the current theme. For old notification osd , press reset button
Posted by
arulmozhi r
at
8:27 PM
2
comments
Email ThisBlogThis!Share to XShare to FacebookShare to Pinterest
Labels:
osd
Tuesday, June 1, 2010
Ubuntu: A download manager Multiget
Multiget is easy to use download manager for ubuntu 1004. It is a gui programme.
Now install the multiget in two easy way 1) ubuntu software centre, 2)terminal
In ubuntu software centre, go to Applications->ubuntu software centre. Then type the word 'multiget' in search box, find the multiget and install.
or in terminal type
sudo apt-get install multiget
Go to applications->internet->multiget the programme will start
Press Add button and copy & paste the required url
Press 'ok' .
Here the file is download. Then go to option for some other settings
Now,change the default save folder,connect time out, etc.,
Posted by
arulmozhi r
at
3:47 PM
0
comments
Email ThisBlogThis!Share to XShare to FacebookShare to Pinterest
Labels:
download
Subscribe to:
Posts (Atom)